
I absolutely love sharing this Starbucks-Inspired Pink Cake Pops Recipe with friends and family because it brings together everything I adore in a sweet treat: vibrant color, a moist and flavorful cake center, and the satisfying crunch of a candy coating. These cake pops are fun to make, adorable to look at, and perfect for any celebration or just spoiling yourself a little. Every bite takes me back to those moments when Starbucks tempts us with something delightful on the side of our coffee. Trust me, once you try this, you’ll quickly add it to your list of go-to desserts!
Why You'll Love This Starbucks-Inspired Pink Cake Pops Recipe
What really excites me about this Starbucks-Inspired Pink Cake Pops Recipe is the balance of flavors and textures. The cake inside stays wonderfully moist thanks to the vanilla frosting binding everything together, while the pink candy coating adds a subtle, sweet crunch without overpowering the cake’s classic flavor. It’s like a little bite of happiness coated in a rosy shell! I love how the pink color lifts your mood immediately—I find them irresistible just by looking at them.
Besides the taste, what makes this recipe special for me is how simple and straightforward it is to prepare. Baking the cake from box mix keeps it easy and reliable, and mixing in frosting to form the cake balls is pure magic—it’s what makes the pops hold their shape so perfectly. Decorating with white sprinkles adds just the right festive touch without fuss. Plus, they’re ideal for birthdays, baby showers, or any festive gathering where you want to wow your guests with a treat that looks like it took hours but really didn’t!
Ingredients You'll Need
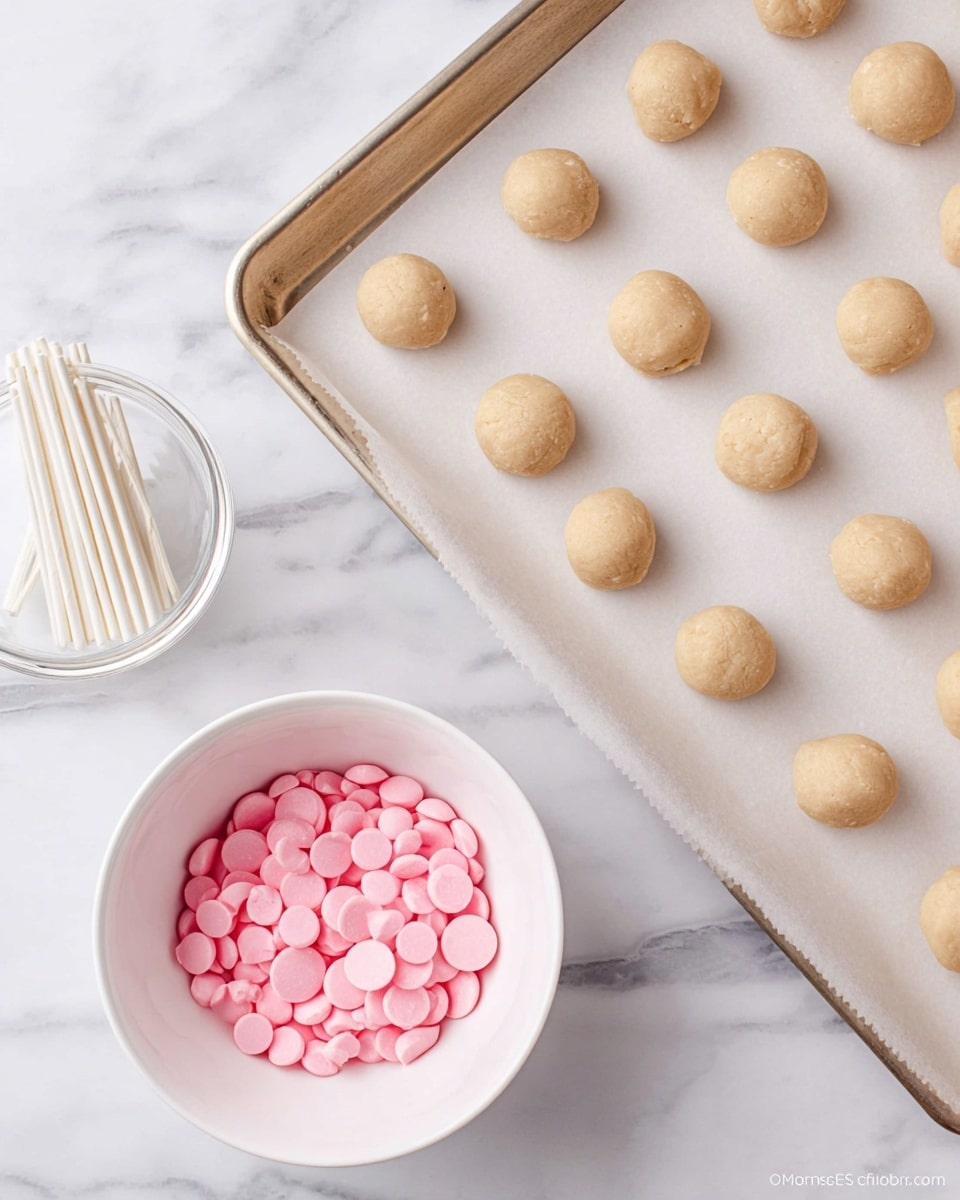
To make these charming cake pops, the ingredients are delightfully simple but each plays a crucial role in the final result—from the tender cake crumb to the glossy pink finish that makes them so irresistible.
- Classic cake mix: This is your cake base, a foolproof way to get a moist and flavorful cake ready in no time.
- Eggs, milk, and vegetable oil (as per cake mix instructions): Essential for baking the cake perfectly according to the package directions.
- Vanilla frosting: Just 3 tablespoons to bind the crumbled cake, giving that perfect consistency for shaping into balls.
- Pink candy melts: They provide that beautiful, smooth coating with a hint of sweetness and that signature pink color.
- Cake pop sticks: These are crucial for handling and serving your cake pops with ease.
- White sprinkles: A fun and simple decoration that adds texture and pops of contrast on the pink coating.
Directions
Step 1: Follow the classic cake mix instructions exactly on the box, mixing in the eggs, milk, and vegetable oil. Pour the batter into your prepared pan and bake as directed. Once baked, let the cake cool completely at room temperature—it’s important not to rush this step because warm cake will be harder to handle.
Step 2: When the cake has fully cooled, gently remove it from the pan. Trim off the browned outer edges to avoid any unwanted texture or flavor. Next, crumble the tender cake into a large bowl until it resembles fine crumbs.
Step 3: Add 3 tablespoons of vanilla frosting to the crumbled cake and mix thoroughly. I find using my hands works best to combine everything evenly—the mixture should hold together when pressed but not be sticky or wet.
Step 4: Shape your cake and frosting mixture into small balls—anywhere from 24 to 36 depending on how big you want your pops. Place these cake balls evenly spaced on a lined baking sheet or tray.
Step 5: Melt the pink candy melts in a microwave-safe bowl by heating in 30-second bursts, stirring in between, until completely smooth with no lumps, so every pop gets an even, glossy coating.
Step 6: Dip the tip of each cake pop stick into the melted candy, then gently insert it halfway into each cake ball. This little trick secures the stick so the cake doesn’t fall off later. Freeze the cake pops on the tray for 10 to 15 minutes until firm.
Step 7: Once firm, dip the entire cake pop into the melted candy melts, ensuring it’s fully coated but letting any excess drip off before moving on.
Step 8: Place the freshly dipped cake pops upright in a block of styrofoam or a stand so they can dry without smudging. While the coating is still wet, sprinkle white sprinkles generously to add that delightful finishing touch.
Step 9: Repeat the dipping and sprinkling process until all your cake pops are coated and decorated. Let them sit at room temperature until the candy shell hardens, then you’re ready to enjoy or gift these gorgeous treats!
Servings and Timing
This Starbucks-Inspired Pink Cake Pops Recipe yields approximately 24 to 36 cake pops, making it perfect for a medium-sized party or a fun dessert spread. Prep time, including mixing and shaping, typically takes about 20 minutes. Baking the cake requires around 25 to 30 minutes according to your cake mix instructions. Add another 10 to 15 minutes for freezing the cake balls and 10 minutes for drying the coating. Overall, you’re looking at about 55 minutes from start to finish, with some cool-down time in between to keep things crisp and manageable.
How to Serve This Starbucks-Inspired Pink Cake Pops Recipe

I love serving these cake pops as the centerpiece at gatherings—they’re not only delicious but a visual treat that brightens up any dessert table. For a fun presentation, I arrange them standing upright in a decorative foam base covered with colored napkins or scatter some edible flowers around the plate for a feminine, festive vibe perfect for baby showers or birthdays. Room temperature is ideal when serving because it lets the candy coating keep its perfect snap without being too hard or sticky.
To elevate the experience, I enjoy pairing these pink cake pops with light beverages like a fruity iced tea, sparkling lemonade, or even a glass of chilled rosé to complement the sweetness without overwhelming it. For a cozy tea party or after-dinner treat, they go beautifully alongside a cup of richly brewed coffee or vanilla chai latte, playing on that classic Starbucks connection. These little pops are also fantastic handed out as party favors or wrapped individually as cute homemade gifts.
For portion size, I usually suggest one or two pops per person alongside some fresh fruit or light snacks, especially for kids’ parties or casual brunches. They’re bite-sized indulgences that combine well with anything from simple finger sandwiches to a fresh fruit salad, making for a delightful, well-rounded spread everyone appreciates.
Variations
One of my favorite things about this Starbucks-Inspired Pink Cake Pops Recipe is how flexible it is, so you can easily switch things up to suit your tastes or dietary needs. For example, if you prefer a gluten-free option, just choose a gluten-free cake mix—it works brilliantly here without changing the texture. For a vegan twist, there are great dairy-free frosting and candy melts alternatives now available that I’ve experimented with to equally delicious results.
If you want to jazz up the flavor, I like adding a teaspoon of lemon zest or peppermint extract to the cake batter before baking—these subtle flavor notes give the pops a fresh twist. You can also swap out the pink candy melts for white chocolate melts and color them with some food-grade pink coloring to customize the shade exactly how you want it. For an extra indulgence, sprinkle crushed freeze-dried raspberries or edible glitter over the coating for stunning texture and sparkle.
While the conventional method involves straight dipping and freezing, I’ve also tried gently rolling the cake balls in crushed nuts or coconut before dipping, which adds an unexpected crunch and visual variation. If you want to save time, some folks like to make mini cake pop bites without sticks, perfect for serving in cupcake liners as petite dessert bites at parties. Each approach offers its own delightful spin on this recipe, so don’t be afraid to get creative!
Storage and Reheating
Storing Leftovers
Whenever I have extras, I store these cake pops in an airtight container at room temperature if I plan to eat them within 2 to 3 days. I make sure the container is tall enough so the coated tops aren’t squished or touching. For longer storage, placing them in the fridge extends their freshness to about a week. Just be sure to bring them back to room temperature before serving so you get the perfect texture again without the candy shell cracking.
Freezing
I do recommend freezing if you want to keep the cake pops for longer than a few days. Wrap each pop individually in plastic wrap or wax paper, then place them in a freezer-safe container or zip-top bag. This prevents moisture buildup that could ruin the candy coating. Frozen cake pops stay great for up to 2 months. When you’re ready to enjoy, thaw them in the fridge overnight and then bring to room temperature for the best eating experience.
Reheating
Since these are cake pops with a candy coating, I avoid any direct reheating like microwaving which can melt the coating and ruin the texture. Instead, I suggest letting them come to room temperature naturally. If the coating feels a bit dull or sticky, a quick blast of cool air from a fan helps refresh the candy’s snap and shine. This way, you maintain that perfect combination of soft cake and crisp coating without any unpleasant sogginess.
FAQs
Can I use homemade cake instead of box mix?
Absolutely! You can use your favorite homemade cake recipe as the base instead of a boxed mix. Just be sure the cake is fully baked and completely cooled before crumbling, and that it’s moist enough to bind well with the frosting. Sometimes homemade cakes can be denser, so you might need a little more frosting to get the right consistency for shaping.
What size cake pops should I make?
I like making mine about 1 to 1.5 inches in diameter—big enough to enjoy in a few bites but small enough to fit comfortably on a stick. This size also makes the coating process easier and keeps the pops from feeling too heavy or messy when eating. You can always go smaller or bigger depending on your event and personal preference.
Can I add different decorations besides white sprinkles?
Definitely! You can personalize your cake pops with colored sprinkles, edible glitter, crushed candy canes, or even drizzle them with contrasting melted chocolate. Fresh edible flowers or themed toppings for holidays are also great options to add flair. Just sprinkle them quickly after dipping before the coating sets to make sure they adhere well.
Why is it important to chill the cake balls before dipping?
Chilling the cake balls solidifies their shape and makes them easier to dip without falling apart. It also helps the candy coating set quickly when applied, giving you that clean, smooth finish on each pop. Skipping this step could result in messy, uneven pops that don’t hold together as nicely.
How long will these cake pops stay fresh?
Stored properly in an airtight container at room temperature, these cake pops remain fresh for about 2 to 3 days. Refrigerating them extends their shelf life to up to a week. For longer storage, freezing is your best bet, keeping them tasty for about 2 months. Just make sure to thaw gently to preserve the texture and coating.
Conclusion
I hope you’re as excited as I am to try this Starbucks-Inspired Pink Cake Pops Recipe! It’s such a joyful dessert to make and share, whether you’re celebrating a special occasion or just craving a fun treat. The combination of easy preparation, stunning presentation, and that tasty pink coating always impresses. Trust me, once you master these, they’ll become a sweet staple in your baking repertoire. Grab your cake mix and let’s get popping!
PrintStarbucks-Inspired Pink Cake Pops Recipe

Delightful Starbucks-inspired cake pops featuring a classic cake base mixed with creamy vanilla frosting, dipped in smooth pink candy melts, and adorned with white sprinkles. These bite-sized treats are perfect for parties or a sweet snack.
- Prep Time: 20 minutes
- Cook Time: 30 minutes
- Total Time: 55 minutes
- Yield: 24-36 cake pops
- Category: Dessert
- Method: Baking
- Cuisine: American
Ingredients
Cake
- 1 box classic cake mix (with ingredients called for on box - typically eggs, milk, and vegetable oil)
Frosting
- 3 Tbsp vanilla frosting (pre-made)
Coating & Decoration
- 12 oz pink candy melts
- White sprinkles
- 24-36 cake pop sticks or lollipop sticks
Instructions
- Prepare the cake: Follow the instructions on the cake mix box by combining the cake mix with required ingredients such as eggs, milk, and vegetable oil. Bake the cake as directed and then let it cool completely at room temperature.
- Crumble the cake: Once cooled, remove the cake from the pan, trim off and discard the brown outer layer, and crumble the remaining cake into fine crumbs in a large mixing bowl.
- Mix with frosting: Add 3 tablespoons of vanilla frosting to the crumbled cake and mix thoroughly until the mixture holds together well enough to form into balls.
- Shape cake balls: Form the mixture into 24 to 36 cake balls, depending on your preferred size, and place them on a lined cookie sheet for easy handling.
- Melt the candy coating: Place 12 ounces of pink candy melts in a microwave-safe bowl. Heat for 30 seconds, stir, then continue heating in 30-second intervals stirring thoroughly each time until completely melted and smooth.
- Insert sticks and chill: Dip the tip of each cake pop stick into the melted candy melts, then insert the stick halfway into each cake ball. Place the cake pops in the freezer for 10 to 15 minutes to set firmly.
- Coat the cake pops: Remove the cake pops from the freezer and dip each one into the melted candy coating until fully covered. Let the excess drip back into the bowl.
- Decorate and dry: Stand the coated cake pops upright by placing the sticks into a block of styrofoam. Immediately sprinkle with white sprinkles before the coating sets to ensure decoration adheres properly.
- Repeat and serve: Continue coating and decorating all the cake pops. Allow them to dry completely before serving.
Notes
- Freezing the cake pops before coating helps the candy shell set properly and prevents the cake from falling apart.
- Make sure the cake is completely cooled before crumbling to avoid a gummy texture.
- You can use different colors of candy melts and sprinkles for customization.
- Store cake pops at room temperature in an airtight container to maintain freshness for up to 3 days.
- Be careful not to overheat candy melts to prevent burning or clumping.


Leave a Reply