
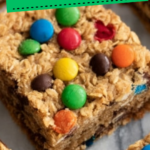
I am so excited to share my absolute favorite treat with you: a Flourless Monster Cookie Bars Recipe that is as fun to make as it is to eat. These bars are packed with peanut butter, oats, chocolate chips, and M&Ms, creating a chewy, colorful, and irresistibly sweet snack that never fails to brighten my day. They come together quickly, require no flour at all, and deliver that perfect monster cookie experience in every single bite. I promise, once you try these bars, they'll become a staple in your recipe collection just like they are in mine!
Why You'll Love This Flourless Monster Cookie Bars Recipe
I genuinely love this recipe because it hits all the right notes when it comes to flavor and texture. The creamy peanut butter melds beautifully with the chewy oats, while the bursts of chocolate chips and mini M&Ms add pockets of sweetness and a satisfying crunch. To me, it’s like a party in every bite. Flavors are perfectly balanced—not too sweet and not too salty—and the way the bars hold together without any flour is nothing short of magic.
Another reason I’m so enthusiastic about this Flourless Monster Cookie Bars Recipe is how easy it is to prepare. If you can mix, press, and bake, you’re golden. No flour measuring or sifting needed, which means less mess and hassle for me, and more time enjoying the delicious results. These bars are perfect for so many occasions too, whether it’s a quick snack, a lunchbox surprise, or dessert at a casual gathering. Honestly, they stand out because they feel homemade but come together so effortlessly—what’s not to love?
Ingredients You'll Need

These ingredients might look simple, but each one plays a crucial role in building the flavor, texture, and color of these monster cookie bars. I always make sure to have them on hand because they’re so versatile and deliver consistent deliciousness every time.
- Peanut butter: I use creamy or crunchy depending on my mood, and it adds richness and a moist base to the bars.
- Brown sugar: This gives the bars their subtle caramel sweetness and helps with the chewy texture.
- Vanilla extract: A splash of vanilla boosts all the other flavors and gives warmth to the recipe.
- Eggs: These bind the ingredients together and give the bars structure without needing flour.
- Old-fashioned rolled oats: I love these for their hearty chew and whole-grain goodness that’s key to the bars’ monster cookie vibe.
- Baking soda: Helps the bars rise slightly and keeps them nice and tender.
- Kosher salt: Just a pinch balances the sweetness perfectly and enhances the other flavors.
- Mini chocolate chips: These little gems melt into gooey pockets of chocolate and add richness.
- Mini M&M candies: I adore these for their fun colors, crunch, and just enough candy coating sweetness.
Directions
Step 1: Preheat your oven to 350°F. Line a 9 x 13-inch baking dish with parchment paper and spray it with some non-stick cooking spray—this makes removing the bars so much easier later.
Step 2: In the bowl of an electric mixer fitted with the paddle attachment, beat together the peanut butter and brown sugar until the mixture is smooth and creamy. Then add the vanilla extract and beat in the eggs one at a time, making sure each egg is fully incorporated before adding the next. This ensures a perfect, even texture.
Step 3: Add the rolled oats, baking soda, and kosher salt to the bowl. Mix everything on low speed until it’s just combined—don’t overmix or the bars might get tough. Finally, stir in the mini chocolate chips and mini M&Ms by hand, so they stay nicely distributed throughout the batter.
Step 4: Press the cookie mixture evenly into your prepared baking dish. It will be a bit crumbly and sticky, but don’t worry—it presses down nicely and will bake into a cohesive bar.
Step 5: Bake the bars for about 30 minutes, or until the top starts turning a light golden brown. Keep an eye on them toward the end because ovens can vary slightly.
Step 6: Once out of the oven, let the bars rest in the pan for at least 15 minutes before slicing. This helps them firm up and makes cutting much easier without crumbling.
Servings and Timing
This recipe makes about 18 generous bars, perfect for sharing or for plenty of snacks throughout the week. Prep time is impressively short—about 10 minutes to mix and get everything in the pan. Baking takes roughly 30 minutes, and then you need to let the bars cool and set for around 15 minutes. So overall, you’re looking at just about 45 minutes from start to finish, which is fantastic for such a hearty, crowd-pleasing treat.
How to Serve This Flourless Monster Cookie Bars Recipe

I love serving these bars slightly warm so that the chocolate chips are still melty and the peanut butter feels extra luscious. They’re fantastic on their own but also pair wonderfully with a cold glass of milk for that classic combo I can’t resist. For a fun twist, try topping each bar with a tiny scoop of vanilla ice cream and a drizzle of caramel sauce—instant dessert magic!
Presentation-wise, I often slice them into smaller squares for snack trays or larger bars if I’m packing lunches or a picnic. Garnishing with a few extra mini M&Ms on top before baking always makes them look more festive and inviting. These bars really shine at casual family dinners, potlucks, or holiday dessert tables where everyone can grab them easily.
If you want to get a little fancy, these bars are great alongside hot coffee or a rich mocha latte for afternoon treats, or even with a creamy, lightly frothed chai tea. For the kids and those who prefer non-caffeinated options, a sparkling fruit soda or homemade lemonade pairs beautifully and keeps things fun and fresh. Regardless of the occasion, serving these bars at room temperature or just slightly warmed is my go-to to get maximum flavor and texture love from every bite.
Variations
Over time, I’ve found some great ways to make this Flourless Monster Cookie Bars Recipe even more personalized. You can swap out the peanut butter for almond or cashew butter if you want a different nutty flavor or need a change. For a chocolate lover’s twist, try adding white chocolate chips or even dried cherries for a tart contrast.
For those following dietary needs, this recipe is naturally gluten-free thanks to the flourless base and oats—just be sure to use certified gluten-free oats if you’re especially sensitive. To make a vegan version, you could experiment with flax eggs or chia eggs instead of regular eggs and use a vegan-friendly sugar and non-dairy chocolate chips. It might take a little trial, but it’s definitely doable and just as delicious.
Finally, if you’re short on time, I sometimes bake the mixture in muffin tins or mini loaf pans for smaller portions and quicker baking times. Alternatively, if you want extra chewiness, try pressing the mixture thinner or adding a spoonful of honey or maple syrup into the mix. There’s so much room to get creative with this recipe, and I love customizing it depending on the mood or occasion.
Storage and Reheating
Storing Leftovers
I keep leftover Flourless Monster Cookie Bars in an airtight container at room temperature, and they stay fresh for about 4 to 5 days. If my kitchen is warm, I prefer to store them in the fridge to keep the chocolate from melting and prevent any peanut oil separation. Just be sure the container seals tightly so the bars don’t dry out.
Freezing
These bars freeze beautifully, which makes them a perfect make-ahead snack. I like to slice them first, then layer the bars in a freezer-safe container separated by sheets of parchment paper to prevent sticking. They’ll keep well frozen for up to 3 months. When ready to enjoy, I thaw them overnight in the fridge or at room temperature for a few hours.
Reheating
When I’m ready to eat frozen or refrigerated bars, I prefer warming them gently either in the microwave for about 15 to 20 seconds or in a low oven at 300°F for 5 to 7 minutes. This brings back that fresh-baked warmth and soft texture that makes these bars so comforting. I avoid overheating as that can dry them out or make the peanut butter separate.
FAQs
Can I use crunchy peanut butter instead of creamy?
Absolutely! I often switch between creamy and crunchy peanut butter and both work wonderfully. Crunchy will add a little extra texture and nutty surprise, which I love in monster cookie bars.
Are these bars gluten-free?
Yes, this Flourless Monster Cookie Bars Recipe is naturally gluten-free since it uses no flour, just oats. To be certain, make sure to select gluten-free certified oats if gluten is a concern for you.
Can I substitute the eggs with a vegan alternative?
Definitely! I’ve had success using flax eggs (1 tablespoon ground flaxseed mixed with 3 tablespoons water for each egg) or chia eggs in this recipe. It might change the texture slightly but keeps the bars chewy and delicious.
How do I prevent the bars from being too crumbly?
Make sure to press the dough firmly and evenly into the pan before baking, and don’t skip the cooling time after baking. This helps the bars set properly. Also, don’t overmix the oats during preparation to maintain the right texture.
Can I add other mix-ins besides chocolate chips and M&Ms?
For sure! These bars are flexible to your favorite add-ins. Try chopped nuts, dried fruit, coconut flakes, or even a swirl of peanut butter or Nutella on top before baking for a fun twist.
Conclusion
I hope you’re as excited as I am to try this Flourless Monster Cookie Bars Recipe—it truly is one of my favorite treats that’s simple, delicious, and perfect for so many occasions. Once you make them, I’m sure you’ll find yourself coming back to this recipe again and again. So grab your ingredients, preheat your oven, and get ready for a batch of chewy, chocolatey, colorful monster cookie bars that everyone will love!
PrintFlourless Monster Cookie Bars Recipe

These Flourless Monster Cookie Bars are a decadent treat packed with peanut butter, oats, chocolate chips, and mini M&Ms. Perfectly chewy and bursting with flavors, they come together without any flour, making them a great option for those avoiding gluten. Baked to golden perfection, these bars are a crowd-pleaser for snacks, dessert, or lunchbox treats.
- Prep Time: 10 minutes
- Cook Time: 30 minutes
- Total Time: 40 minutes
- Yield: 18 servings
- Category: Dessert
- Method: Baking
- Cuisine: American
- Diet: Gluten Free
Ingredients
Wet Ingredients
- 2 cups creamy or crunchy peanut butter
- 1 cup brown sugar
- 2 teaspoons vanilla extract
- 2 large eggs
Dry Ingredients
- 2 and ½ cups old-fashioned rolled oats
- 1 teaspoon baking soda
- 1 teaspoon kosher salt
Mix-Ins
- 1 cup mini chocolate chips
- 1 cup mini M&M candies
Instructions
- Preheat and prepare pan: Preheat your oven to 350°F (175°C). Line a 9 x 13-inch baking dish with parchment paper and lightly spray with non-stick cooking spray to prevent sticking.
- Mix wet ingredients: In the bowl of an electric mixer fitted with the paddle attachment, beat together the peanut butter and brown sugar until smooth and creamy. Add the vanilla extract, then incorporate the eggs one at a time, beating well after each addition to combine thoroughly.
- Add dry ingredients: Reduce the mixer speed to low and add the rolled oats, baking soda, and kosher salt. Mix just until all dry ingredients are evenly combined into the peanut butter mixture.
- Fold in mix-ins: Remove the bowl from the mixer and gently stir in the mini chocolate chips and mini M&Ms using a spatula to evenly distribute without overmixing.
- Press dough into pan: Transfer the crumbly dough into the prepared baking pan, pressing it down evenly with your hands or the back of a spatula. The dough will be crumbly but should hold together when pressed into the pan.
- Bake: Place the baking dish in the preheated oven and bake for 30 minutes or until the top of the bars is golden brown and set.
- Cool and slice: Remove the pan from the oven and allow the bars to rest for at least 15 minutes to firm up before lifting them out using the parchment paper. Slice into 18 bars and serve.
Notes
- Use either creamy or crunchy peanut butter based on your texture preference.
- Be careful not to overbake to keep the bars chewy and moist.
- These bars can be stored in an airtight container at room temperature for up to 5 days, or frozen for longer storage.
- For a gluten-free option, ensure the rolled oats are certified gluten-free.
- Pressing the crumbly dough firmly into the pan is key to getting bars that hold together well.


Leave a Reply